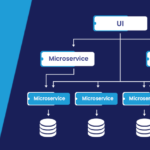
Why is Circuit Breaker Pattern?
If we design our systems on microservice-based architecture, we will generally develop many Microservices and
those will interact with each other heavily in achieving certain business goals. Now, all of us can assume that
this will give the expected result if all the services are up and running and the response time of each service
is satisfactory.
Now, what will happen if any service, of the current Ecosystem, has some issue and stopped servicing the
requests. It will result in timeouts/exception and the whole Eco system will get unstable due to this single
point of failure.
Here circuit breaker pattern comes handy and it redirects traffic to a fall back path once it sees any such
scenario. Also it monitors the defective service closely and restore the traffic once the service came back to
normalcy.
So circuit breaker is a kind of a wrapper of the method which is doing the service call and it monitors the
service health and once it gets some issue, the circuit breaker trips and all further calls goto the circuit
breaker fall back and finally restores automatically once the service came back !! That’s cool right?
Circuit Breaker Sequence of Invocation
Hystrix Circuit Breaker Example
To demo circuit breaker, we will create the following two microservices where first is dependent on another.
- Student Microservice – Which will give some basic functionality on the Student entity. It
will be a REST-based service. We will call this service from School Service to understand the
Circuit Breaker. It will run on port 8098 in the localhost. - School Microservice – Again a simple REST-based microservice where we will implement circuit breaker
using Hystrix. Student Service will be invoked from here and we will test the fallback path
once student service will be unavailable. It will run on port 9098 in the localhost.
Tech Stack and Demo Runtime
- Java 1.8
- Eclipse as IDE
- Maven as a build tool
- Spring cloud Hystrix as circuit breaker framework
- Spring boot
- Spring Rest
Create a Student Service
Follow these steps to create and run Student Service – a simple REST service providing some basic functionality
of the Student entity.
Create a spring boot project
Create a Spring boot project from Spring Boot initializer portal with three dependencies
i.e. Web, Rest Repositories and Actuator. Give other maven GAV coordinates and download the
project.
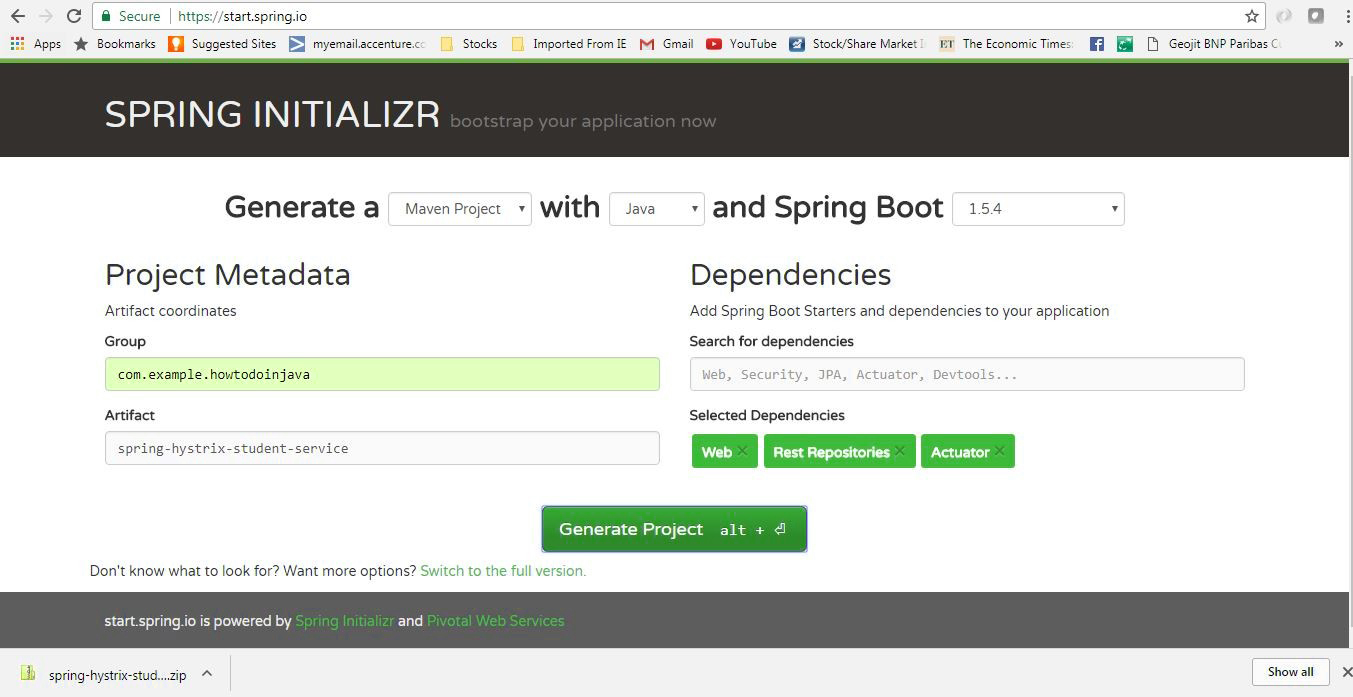
Unzip and import the project into Eclipse as an existing maven project. In this step, all necessary dependencies
will be downloaded from the maven repository.
Server Port Settings
Open application.properties and add port information.
server.port = 8098
This will enable this application run on default port 8098. We can easily override this by
supplying -Dserver.port = XXXX argument at the time of starting the server.
Create REST APIs
Now add one REST controller class called StudentServiceController and expose one rest endpoint for
getting all the student details for a particular school. Here we are
exposing /getStudentDetailsForSchool/{schoolname} endpoint to serve the business
purpose. For simplicity, we are hard coding the student details.
StudentServiceController.java
import java.util.ArrayList;
import java.util.HashMap;
import java.util.List;
import java.util.Map;
import org.springframework.web.bind.annotation.PathVariable;
import org.springframework.web.bind.annotation.RequestMapping;
import org.springframework.web.bind.annotation.RequestMethod;
import org.springframework.web.bind.annotation.RestController;
import com.example.howtodoinjava.springhystrixstudentservice.domain.Student;

@RestController
public class StudentServiceController {

    private static Map<String, List<Student>> schooDB = new HashMap<String, List<Student>>();

    static {
        schooDB = new HashMap<String, List<Student>>();

        List<Student> lst = new ArrayList<Student>();
        Student std = new Student("Sajal", "Class IV");
        lst.add(std);
        std = new Student("Lokesh", "Class V");
        lst.add(std);

        schooDB.put("abcschool", lst);

        lst = new ArrayList<Student>();
        std = new Student("Kajal", "Class III");
        lst.add(std);
        std = new Student("Sukesh", "Class VI");
        lst.add(std);

        schooDB.put("xyzschool", lst);

    }

    @RequestMapping(value = "/getStudentDetailsForSchool/{schoolname}", method = RequestMethod.GET)
    public List<Student> getStudents(@PathVariable String schoolname) {
        System.out.println("Getting Student details for " + schoolname);

        List<Student> studentList = schooDB.get(schoolname);
        if (studentList == null) {
            studentList = new ArrayList<Student>();
            Student std = new Student("Not Found", "N/A");
            studentList.add(std);
        }
        return studentList;
    }
}
Student.java
public class Student {

    private String name;
    private String className;

    public Student(String name, String className) {
        super();
        this.name = name;
        this.className = className;
    }

    public String getName() {
        return name;
    }

    public void setName(String name) {
        this.name = name;
    }

    public String getClassName() {
        return className;
    }

    public void setClassName(String className) {
        this.className = className;
    }
}
Build and Test Student Service
Now do a final build using mvn clean install and run the server using command java -jar
target\spring-hystrix-student-service-0.0.1-SNAPSHOT.jar. This will start the student service in
default port 8098.
Open browser and type http://localhost:8098/getStudentDetailsForSchool/abcschool.
It should show the below output in a browser –
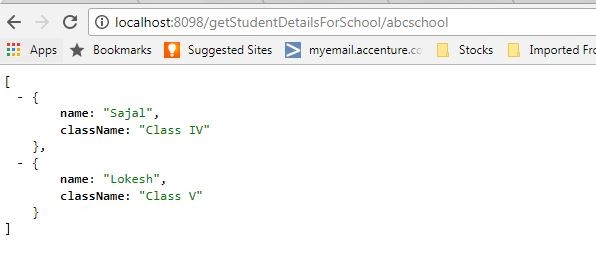
Student Service Response
Create School Service – Hystrix Enabled
Similar to Student service, create another microservice for School. It will internally invoke already developed
Student Service.
Generate spring boot project
Create a Spring boot project from Spring Boot initializer portal with those dependencies mainly.
- Web – REST Endpoints
- Actuator – providing basic management URL
- Hystrix – Enable Circuit Breaker
- Hystrix Dashboard – Enable one Dashboard screen related to the Circuit Breaker monitoring
Give other maven GAV coordinates and download the project.
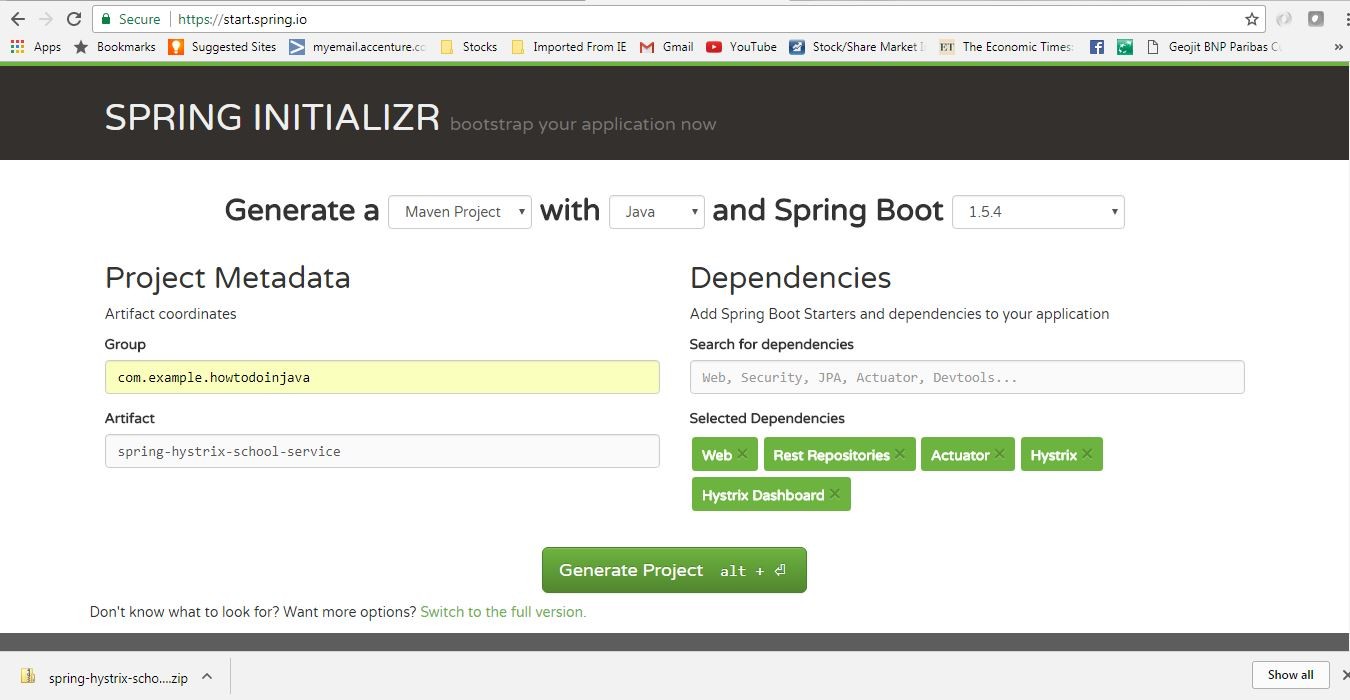
School Service Project
Unzip and import the project into Eclipse as an existing maven project. In this step, all necessary
dependencies will be downloaded from the maven repository.
Server Port Settings
Open application.properties and add port information.
server.port = 9098
This will enable this application run on default port 9098. We can easily override this by
supplying -Dserver.port = XXXX argument at the time of starting the server.
Enable Hystrix Settings
Open SpringHystrixSchoolServiceApplication i.e the generated class
with @SpringBootApplication and
add @EnableHystrixDashboard and @EnableCircuitBreaker annotations.
This will enable Hystrix circuit breaker in the application and also will add one useful dashboard
running on localhost provided by Hystrix.
import org.springframework.boot.SpringApplication;
import org.springframework.boot.autoconfigure.SpringBootApplication;
import org.springframework.cloud.client.circuitbreaker.EnableCircuitBreaker;
import org.springframework.cloud.netflix.hystrix.dashboard.EnableHystrixDashboard;

@SpringBootApplication
@EnableHystrixDashboard
@EnableCircuitBreaker
public class SpringHystrixSchoolServiceApplication {

    public static void main(String[] args) {
        SpringApplication.run(SpringHystrixSchoolServiceApplication.class, args);
    }
}
Add REST controller
Add SchoolServiceController Rest Controller where we will
expose /getSchoolDetails/{schoolname} endpoint which will simply return school details along with its
student details. For Student Details, it will call the already developed Student service endpoint. We will
create a Delegate layer StudentServiceDelegate.java to call the Student Service. This simple Code will
look like
SchoolServiceController.java
import org.springframework.beans.factory.annotation.Autowired;
import org.springframework.web.bind.annotation.PathVariable;
import org.springframework.web.bind.annotation.RequestMapping;
import org.springframework.web.bind.annotation.RequestMethod;
import org.springframework.web.bind.annotation.RestController;
import com.example.howtodoinjava.springhystrixschoolservice.delegate.StudentServiceDelegate;

@RestController
public class SchoolServiceController {

    @Autowired
    StudentServiceDelegate studentServiceDelegate;

    @RequestMapping(value = "/getSchoolDetails/{schoolname}", method = RequestMethod.GET)
    public String getStudents(@PathVariable String schoolname) {
        System.out.println("Going to call student service to get data!");
        return studentServiceDelegate.callStudentServiceAndGetData(schoolname);
    }
}
StudentServiceDelegate
We will do the following things here to enable Hystrix circuit breaker.
- Invoke Student Service through spring framework provided RestTemplate
- Add Hystrix Command to enable fallback method – @HystrixCommand(fallbackMethod =
“callStudentServiceAndGetData_Fallback”) – this means that we will have to add another
method callStudentServiceAndGetData_Fallback with same signature, which will be
invoked when actual Student service will be down. - Add fallback method – callStudentServiceAndGetData_Fallback which will simply return some default
value.
import java.util.Date;
import org.springframework.beans.factory.annotation.Autowired;
import org.springframework.context.annotation.Bean;
import org.springframework.core.ParameterizedTypeReference;
import org.springframework.http.HttpMethod;
import org.springframework.stereotype.Service;
import org.springframework.web.client.RestTemplate;
import com.netflix.hystrix.contrib.javanica.annotation.HystrixCommand;

@Service
public class StudentServiceDelegate {

    @Autowired
    RestTemplate restTemplate;

    @HystrixCommand(fallbackMethod = "callStudentServiceAndGetData_Fallback")
    public String callStudentServiceAndGetData(String schoolname) {

        System.out.println("Getting School details for " + schoolname);

        String response = restTemplate
                .exchange("http://localhost:8098/getStudentDetailsForSchool/{schoolname}"
                , HttpMethod.GET
                , null
                , new ParameterizedTypeReference<String>() {
            }, schoolname).getBody();

        System.out.println("Response Received as " + response + " -  " + new Date());

        return "NORMAL FLOW !!! - School Name -  " + schoolname + " :::  " +
                    " Student Details " + response + " -  " + new Date();
    }

    @SuppressWarnings("unused")
    private String callStudentServiceAndGetData_Fallback(String schoolname) {

        System.out.println("Student Service is down!!! fallback route enabled...");

        return "CIRCUIT BREAKER ENABLED!!! No Response From Student Service at this moment. " +
                    " Service will be back shortly - " + new Date();
    }

    @Bean
    public RestTemplate restTemplate() {
        return new RestTemplate();
    }
}
Build and Test of School Service
Now do a final build using mvn clean install and run the server using the command java
-jar target\spring-hystrix-school-service-0.0.1-SNAPSHOT.jar. This will start the school service in
default port 9098.
Start the student service as described above and then test school service by opening browser and
type http://localhost:9098/getSchoolDetails/abcschool. It should show the below output in browser :

School Service Response
Test Hystrix Circuit Breaker – Demo
The opening browser and type http://localhost:9098/getSchoolDetails/abcschool.
It should show the below output in a browser –

School Service Response
Now we already know that School service is calling student service internally, and it is getting student details
from that service. So if both the services are running, school service is displaying the data returned by
student service as we have seen in the school service browser output above. This is CIRCUIT CLOSED State.
Now let us stop the student service by just pressing CTRL + C in the student service
server console (stop the server) and test the school service again from browser. This time it will return the
fallback method response. Here Hystrix comes into the picture, it monitors Student service infrequent interval
and as it is down, the Hystrix component has opened the Circuit and fallback path enabled.
Here is the fallback output in the browser

School Service Response Fallback path
Again start the Student service, wait for a few moments and go back to school service and it will again start
responding in normal flow.
Hystrix Dashboard
As we have added hystrix dashboard dependency, hystrix has provided one nice Dashboard and a Hystrix Stream in
the bellow URLs:
- http://localhost:9098/hystrix.stream – It’s a continuous stream that
Hystrix generates. It is just a health check result along with all the service calls that are being
monitored by Hystrix. Sample output will look like in browser –
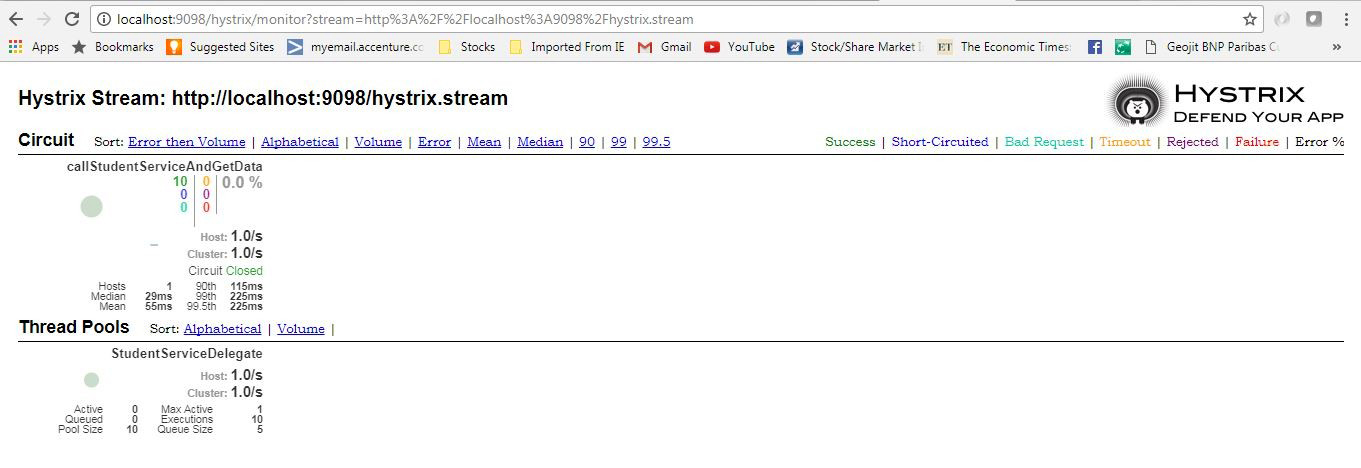
Hystrix Stream output
http://localhost:9098/hystrix – This is a visual dashboard initial state.
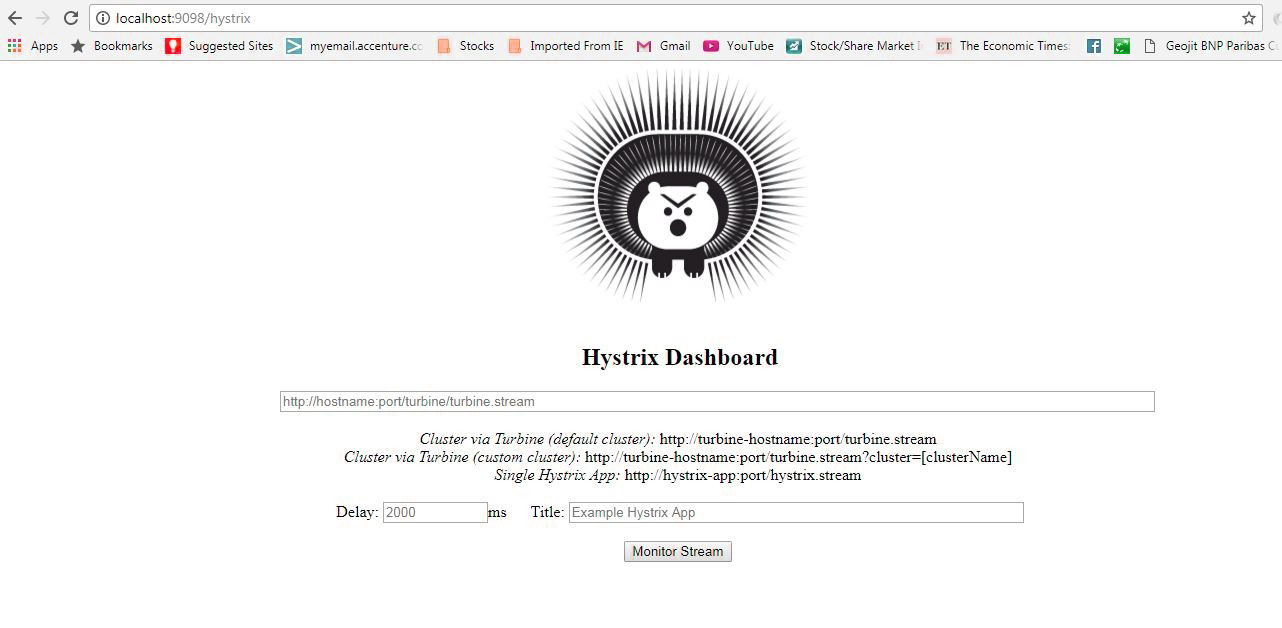
Hystrix Initial Dashboard
Now add http://localhost:9098/hystrix.stream in a dashboard to get
a meaningful dynamic visual representation of the circuit being monitored by the Hystrix component. Visual
Dashboard after providing the Stream input in the home page –

Summary
That’s all about creating spring could Hystrix Circuit Breaker, we have tested both circuit open
path and circuit closed path. Do the setup on your own and play with different combination service
state to be more clear of whole concept.


